Tongariro Alpine Crossing – My NZ Highlight

We’re off to visit Tongariro National Park up in the mountains.  Volcanic mountains.   I’m particularly interested in the Tongariro Alpine Crossing, regarded as NZ’s best day hike – and certainly its most popular.   Although it’s a day hike, it’s a long one – 12 miles in length with a 2400 ft elevation change.  You get dropped off at one end and picked up at the other, so you have to complete the climb in the allotted hours.  At this time of the year, however, the hike is iffy – it’s dangerous if you’re caught on the trail in a storm, and all but impassable in snow.  We’ll see what it’s like when we get there.

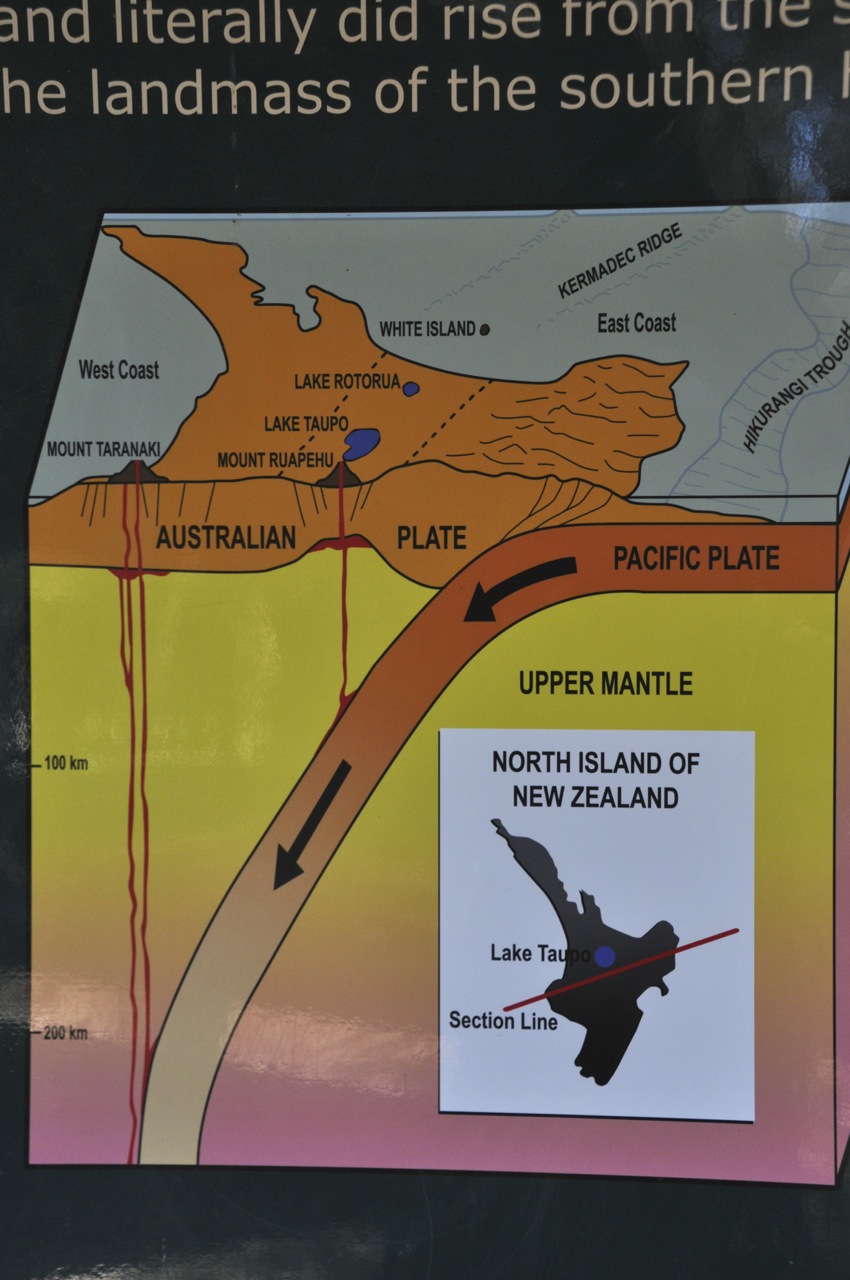
To get to Tongariro National Park we swing by the southern part of Lake Taupo, NZ’s Lake Taupo on a cloudy day.  The lake is huge, an approximately circular inland sea
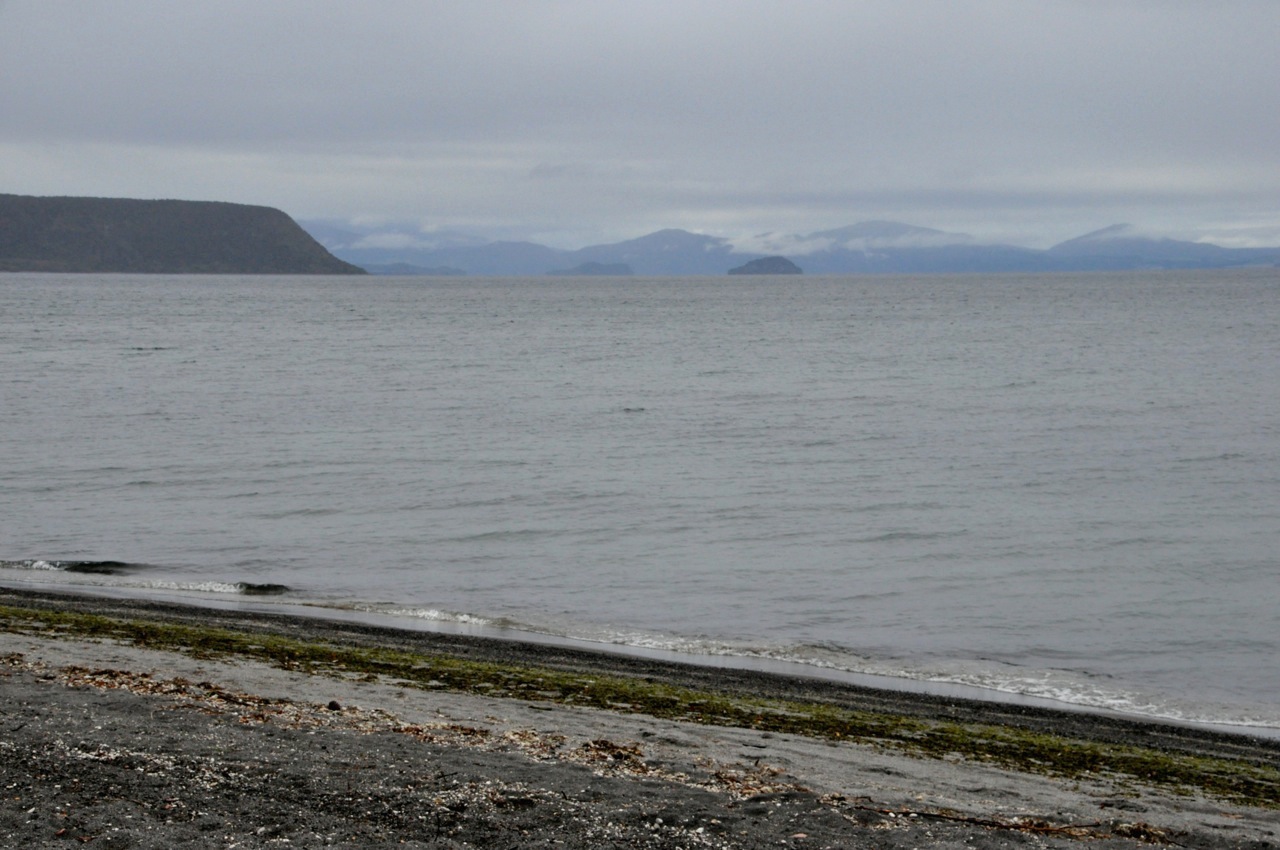
largest lake (it’s huge).  I showed you this lake before (Nov 6, 2013; Rotorua – Geothermal Wonderland).  If you remember, this enormous lake used to be a monster volcano that massively blew in 186 AD, blackening the skies of China and turning the sky of Rome blood-red, half a world away.  The fact that this huge lake is a caldera is astonishing.  The Tongariro National Park is located in this same area of intersecting tectonic plates, and its (much smaller) volcanoes have erupted regularly.  The Tongariro Alpine Crossing traverses this region of active volcanoes, one of which played the part of  Mount Doom in Lord of the Rings.

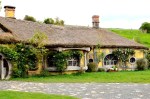
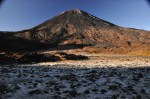
We’re staying in a fancy place at Whakapapa Village (an interesting name – NZ uses the Chateau Tongariro, with Mt. Ruapehu in the backgroundMaori pronunciation for names, and “wh” is pronounced as an “f”).  We’re at the Chateau Tongariro, a very elegant heritage hotel built in 1929 in Great Gatsby style.  It’s fantastic.  That mountain in the background is Mt. Ruapehu, a ski destination in wintertime but also an active volcano (recent eruptions in 1995, 1996, & 2007 – occasionally emptying its crater lake down the mountainside).  The volcano is best seen from the other side, shown below.  The absence of Mt. Ruapehu’s top is impressive, yes?Mt. Ruapehu, an active volcano and ski slope

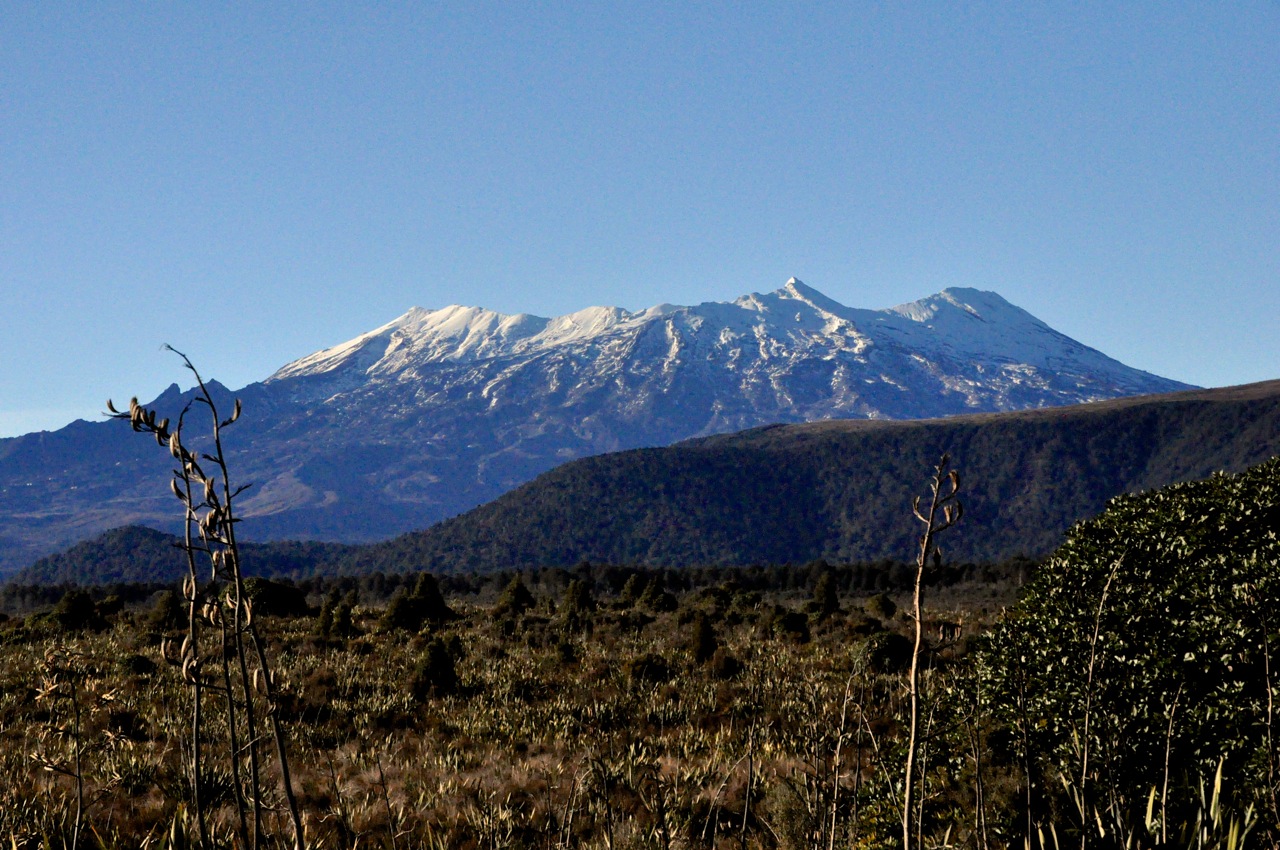
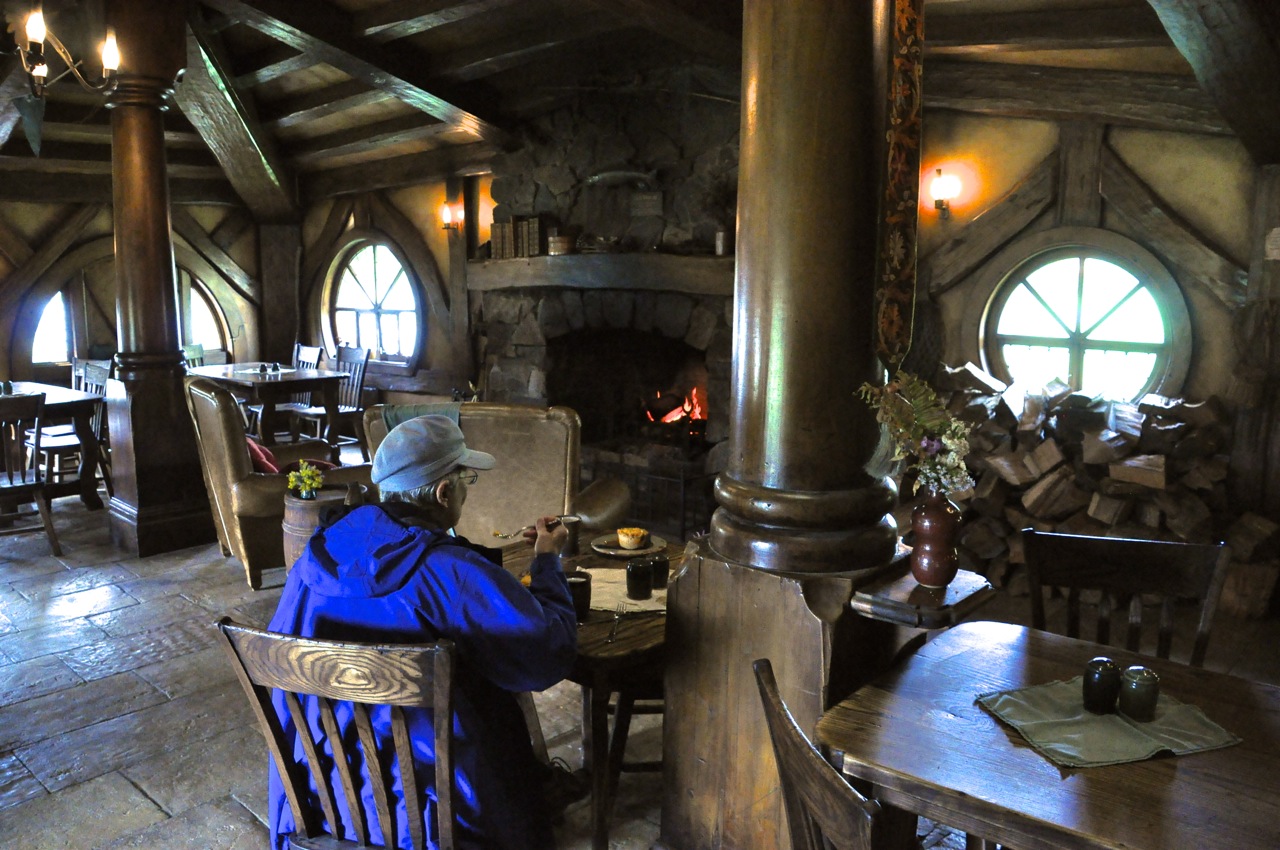
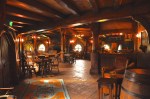
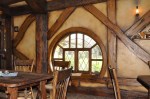
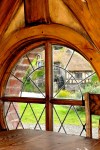
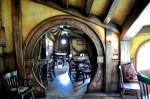
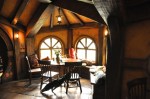
The interior of Chateau Tongariro is as elegant  as the outside,  with attentive staff to make you comfortable (“Would you like me to start a fire in the fireplace?  A cup of tea, perhaps?”).  High tea in that interior was a treat, and of course there’s a bar right there.  You feel rich just sitting in one of those chairs.  This Chateau is in the middle of nowhere, mind you, so keeping it going is an amazing feat.

It’s competing with hostels with bunk beds, so maybe that helps.

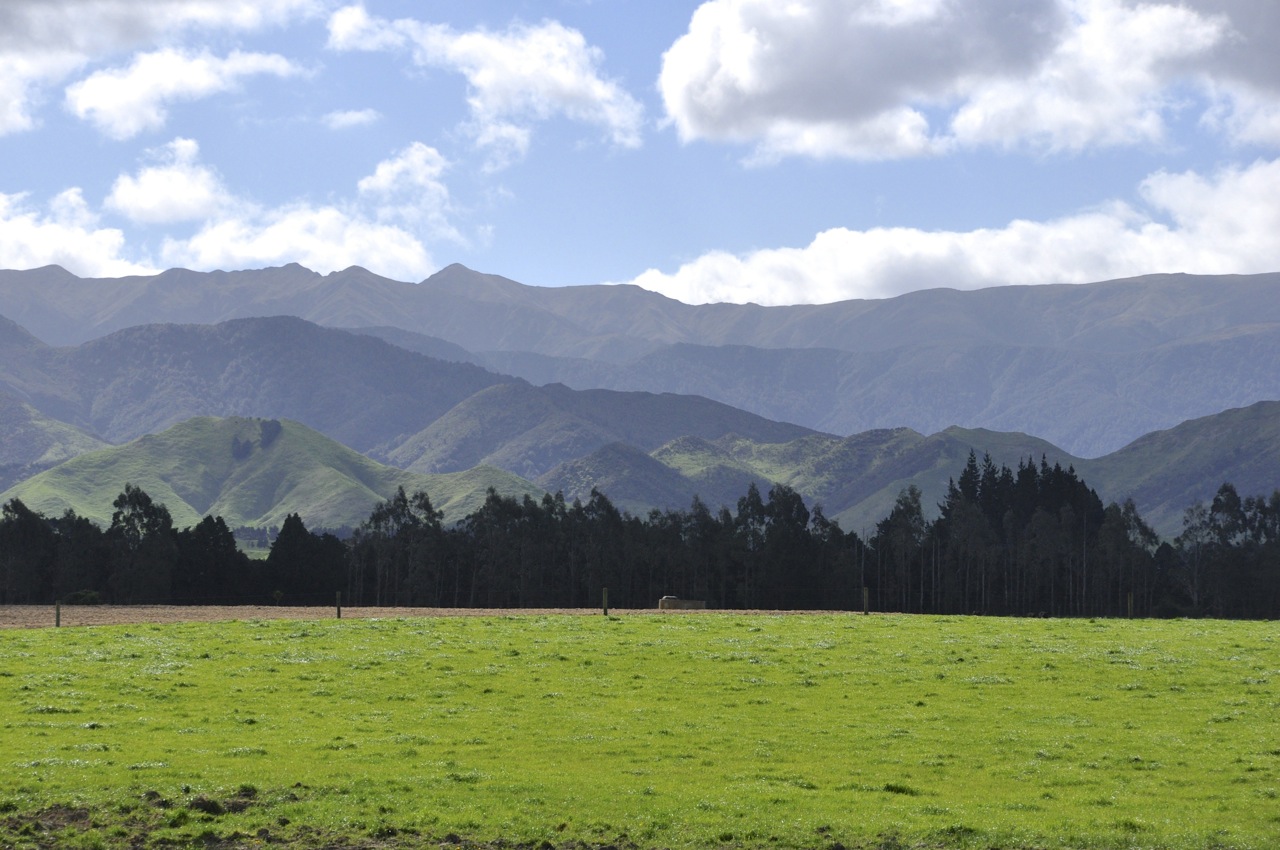
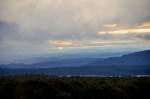
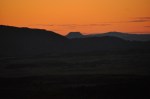
The view from the Chateau is amazing.  A wide expanse of lawn leads your eye to gentle hills and picturesque mountains, with Mt. Ngauruhoe (Mt. Doom) looming  in the background; at sunset, this magnificent scenery is painted in gorgeous shades of pink and orange.  Wow!

Just before we arrived here, the Tongariro Alpine Crossing was closed, the tour operators no longer operating their drop-off/pick-up service due to heavy snow, and subsequently rain and fog.  In the height of the summer season, the Alpine Crossing is packed, with up to 700 people per day crossing in conga lines from both sides, but this is an iffy time of the year and the crowds are gone.  Since I don’t have winter clothes or crampons with me, Ginger is not going to let me take this hike unless the weather is perfect – and guess what – the weather is perfect!  Most of the snow is gone, the route is clear, and the ranger says I should have no trouble, especially if I wear Ginger’s tights (temperatures are below freezing).  Whoopeeee!  So off I go!  Ginger will hike the nearby trail to Taranaki Falls while I’m doing my thing.

Start of the trail, soon after the car park
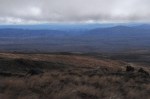
I decide to take the 2nd departure at 8am rather than 7, when the temperature will be warmer – but I’ll have an hour less to make the hike.  Still, at an estimated traverse time of 6-8 hours, and pick-up at 3pm and 4pm, I should be fine.  We start out with the sun rising behind the mountains, so we’re in shadow; frost and snow is here-and-there.  Notice how flat the trail starts!  I am not deceived.

The trail is actually flat for quite a while, but then takes off steeply.  A waterfall comes into

view; it may not look like much in this picture, but it’s deceiving – those rocks at the bottom are about people-size!  Mt. Ngauruhoe looms ahead; in the other direction, Mt. Egmont (Mt. Taranaki in Mauri) “peaks” (pun) over the hill from the distant Egmont National Park.  Yep, Mt. Egmont is a volcano too, classified as “active but quiescent (last eruption, 1755)”.  It has it’s own movie fame as the backdrop to The Last Samurai.

Looking back at the car park, left end of the far ridgeWe’re still going up steeply.  Notice how wonderful/ functional the trail is!  I’ve made good progress – the car park is visible at the end of that middle ridge to the left of the people.  Speaking of people, I expected to be pretty lonely on the trail, and I am not!  As it turns out, with the bad weather, hikers holed up for a week and now everybody is out while the hiking is possible.  It’s not crowded, mind you, and having some company is nice.

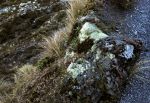
It’s still quite frosty in the shadows, as you can see on the plants and the smooth old lava flows.  The frost makes the interesting vegetation even more attractive.  I’m now pretty much at the base of Mt. Ngauruhoe, which rears up impressively.  I’ve climbed about a 1000 ft in elevation; oh good, only 1400 more to go!

Another waterfall comes into view, and then we really start to  climb.  The vegetation disappears; this is definitely volcano land.

I’m getting higher, and the trail now has steep drop-offs at the edges!  Notice the fog-filled valley off in the distance – I’ll get to that in the next post, stay tuned.

Finally I’m on the skirts of “Mt Doom”, and it is steep indeed.  And pretty much lifeless.  Mt. Doom indeed!  An information board shows the history of recent eruptions, the last one only 40 years ago.

Mt. Ngauruhoe is impressive this close up.  It has a red, angry lip, and small puffs of steam are escaping from the interior.  I would so love to look down the crater of “Mt. Doom”,

but the side trail up is difficult scree, and more importantly, I don’t have the extra 3 hours.  Next visit, right?

I’ve been hiking up this trail for hours now, and due to the bleakness of the landscape I can still see all the way back to the trailhead, ‘way down there!  That is about to change, however; the trail levels out across an older crater called the South Crater, and I’ll soon be

trading this view for new ones.  One last look at the impressive Mt. Egmont off in the distance.

The South Crater is blessedly flat, but I feel a certain uneasiness in this flatness surrounded by crater walls.  There is a clear cognizance that I am walking in a caldera, and in years past this was not a good place to be!  There is no danger, of

course, but funny how my pace has quickened.  Must be the flatness, surely.  And then the trail heads up again, up a crater wall and then along the crater ridge, with new views.

The trail is steep again!  Steep enough that a cable is provided to allow navigation of a narrow ledge.  The picture on the left doesn’t show the steep part; it was scary enough that I was not tempted to take a picture there, survival being foremost in my thoughts.

A look back (above right) shows Mt. Ngauruhoe and a part of the South Crater; the lower right picture shows a piece of Mt. Ngauruhoe behind a sign indicating a side trail to the smaller Mt. Tongariro, the namesake of this national park.  The trail crosses a saddle between Mt. Ngauruhoe and Mt. Tongariro, a peak that I haven’t shown you because it’s less impressive.  But hey, taking that summit is only an extra hour (or so)!  How can I resist??  So off I go, up a ridge, as shown below.

It’s pretty steep climbing, but the overviews at the summit should be worth the effort.  The picture above right presents a good view of the South Crater, giving you a better feeling for how big and impressive it is.  Then, at the summit of Mt. Tongariro, the My favorite picture of Mt. Ngauruhoeworld is at my feet.  This is why I love climbing mountains!  On a clear day, you can see forever, and with pounding heart and amazed eyes you revel in being alive.  The picture to the left is my favorite view of Mt. Ngauruhoe.  Now let’s look around to new views, ones we will be visiting shortly.  First, the Blue Lake.

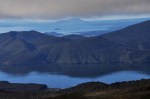
I plan to have a late lunch there at the lake (carrot reward; works for donkeys, doesn’t it?).  If you look at that notch in the left image, it’s pretty spectacular.  There’s this low-flying “cloud” below the notch (turns out it’s not your normal cloud), and the view beyond is the

very beautiful Lake Taupo.  The view is gorgeous!!  I can see the horizon for most of the 360; the view is probably better than one of those $1 mil Space Shuttle tourist rides.

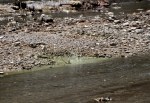
To get to that Blue Lake, I must first hike past the Red Crater and the Emerald Lakes; sounds colorful, doesn’t it?  I can see some of the Emerald Lakes from here (below right).

Don’t they look cool?  The picture on the left shows the way down … time to get truckin’.

I’m back on the Alpine Crossing Trail again, and apparently walking past the Red Crater,

but the view is confusing; I can’t really see a crater, but those walls are definitely red!  In the left picture below you can see the “mini-mountain” that I have to climb; doesn’t it

look like this is the end of the trail?  Some big monster ate the rest of the mountain?  Any descent looks like it will be steep!  When I get to the top, there is a nice view of my lunch site, the Blue Lake, and Lake Taupo behind that.  Gorgeous!  But concentrate: we’re going very down-down, quickly, to the Emerald Lakes.  As you can see in the pictures below, the

Emerald Lakes are stunning – and the trail (indicated by the people on it) seems more fit for lemmings.  The trail isn’t quite vertical, it’s more like a playground slide; it’s really steep, mostly sandy – a black sandy pumice – and there seem to be 2 choices to get down; going extremely slowly, which most people are doing, sometimes on their butt (this seems to be a collection point for people, it’s crowded), or falling/sliding/skating at great speed (involving some dodging).  Either way, a lot of people are falling, so why go slow?  Well, I only fell once, probably par for the course; broke the plastic protector over the viewing screen of my camera – happily, no real harm done.

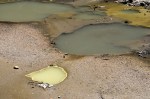
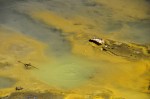
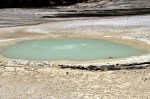
I’m now at the Emerald Lakes, and they’re really pretty!  As shown below, they exhibit a

variety of shades of green within the same lake, along with other colors like yellow and blue.  Notice the steam coming from behind one of the lakes, top right picture; it’s proof we’re on a volcano, with Smaug under our feet!  The bottom right picture shows one of the steam vents.  Pretty cool!  Anyone for spelunking?

Leaving the Emerald lakes, the trail goes up and provides a great view of the lake and the broad vista beyond.  It’s a very beautiful area!  Turning around, I finally see enough of

the Red Crater to discern that it is a crater.  That last picture also shows the sliding-path down, which you might notice is very steep and downright vertical at some spots.

Once again I’m hiking across a caldera in volcano land – this one called the Central Crater (below).  There is a creatively named North Crater, which you can see in the first picture of the Blue Lake that I showed earlier, but the trail doesn’t go across it.  The

trail then goes up to the Blue Lake, pretty steeply, but the elevation affords a spectacular overview looking back.  Look at those volcanoes all lined up in the picture on the right!  The snow-covered peak behind Mt. Ngauruhoe is Mt. Ruapehu.  It’s pretty clear where those tectonic plates are intersecting!

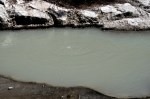
There’s not much view from the Blue Lake, other than the Blue Lake itself, but it’s pretty enough!  The lake is not just blue; like the Emerald Lakes, the periphery of the Blue Lake

is a variety of colors.  Lunch here is a nice respite.  In addition to water, I’ve been carrying a Coke, and with lunch it tastes oh so very good!  Must be the sugar.  From here on, the trail will be all downhill – that’s the good news.  The bad news, I’m not too much more than half-way across the Alpine Crossing.

Leaving the Blue Lake, the trail goes to that notch in the mountains I pointed out from the

top of Mt. Tongariro.  That low-flying “cloud” is still there, below the notch.  And it’s a pretty active cloud, being blown around a bit; swirling, really.  Eh, what?  I’ve been in lots of clouds in mountains before, but it’s always been more of a creeping nebulous fog that surrounds all; not so well defined and discrete as this one.  Walking further,

with the cloud still ahead, a sign portends the answer.  Another volcano?  Haven’t I left them?  Around the next bend I am suddenly confronted by a mountainside going Vegetation everywhere, as far as the eye can see; cloud in backgrounddown, seemingly forever, and covered in colorful vegetation – not your volcano scenario.  It’s a looooooong mountainside, with amazingly long switchbacks terracing into the distance.  The switchbacks go towards and then away from the cloud; sometimes the wind blows the cloud over the trail.

Still, the source of the cloud remains a mystery, until I encounter this sign, below left; the cloud must be steam escaping from somewhere, but there is nothing remotely resembling

a volcano here.  On a long leg away from the cloud source there does come into view a bleak area of the hillside that is emitting steam from small fumaroles, but it’s not much, and that steam just vaporizes into the air.  However, on the long return toward the cloud, the wind shifts up the mountain and the cloud source is revealed.  It’s still far away, but the side of the mountain is really smoking!  As I get closer, steam is absolutely pouring from a large ravine in the mountain, with a long string of fumaroles venting from along the

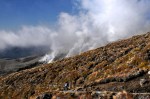
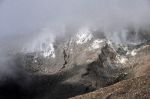
top of the ravine.  A very lifeless ravine, may I add.  What is coming out of this volcano is steam, forming a harmless cloud that we walk in and out of multiple times.  But I can imagine, in more exciting times, that the steam could be gray ash, and we can’t breathe, and retreat is impossible.  I’m very happy that this mountain is a sleeping dog!

I’ve actually been running down many of these switchbacks; the distance markers suggest that I could make the 3pm shuttle if I hurry; otherwise I’ll have the better part of an hour to wait.  However, the view from the trail is not bad!  So I stop to take some pictures.

The active volcano (fumarole) region
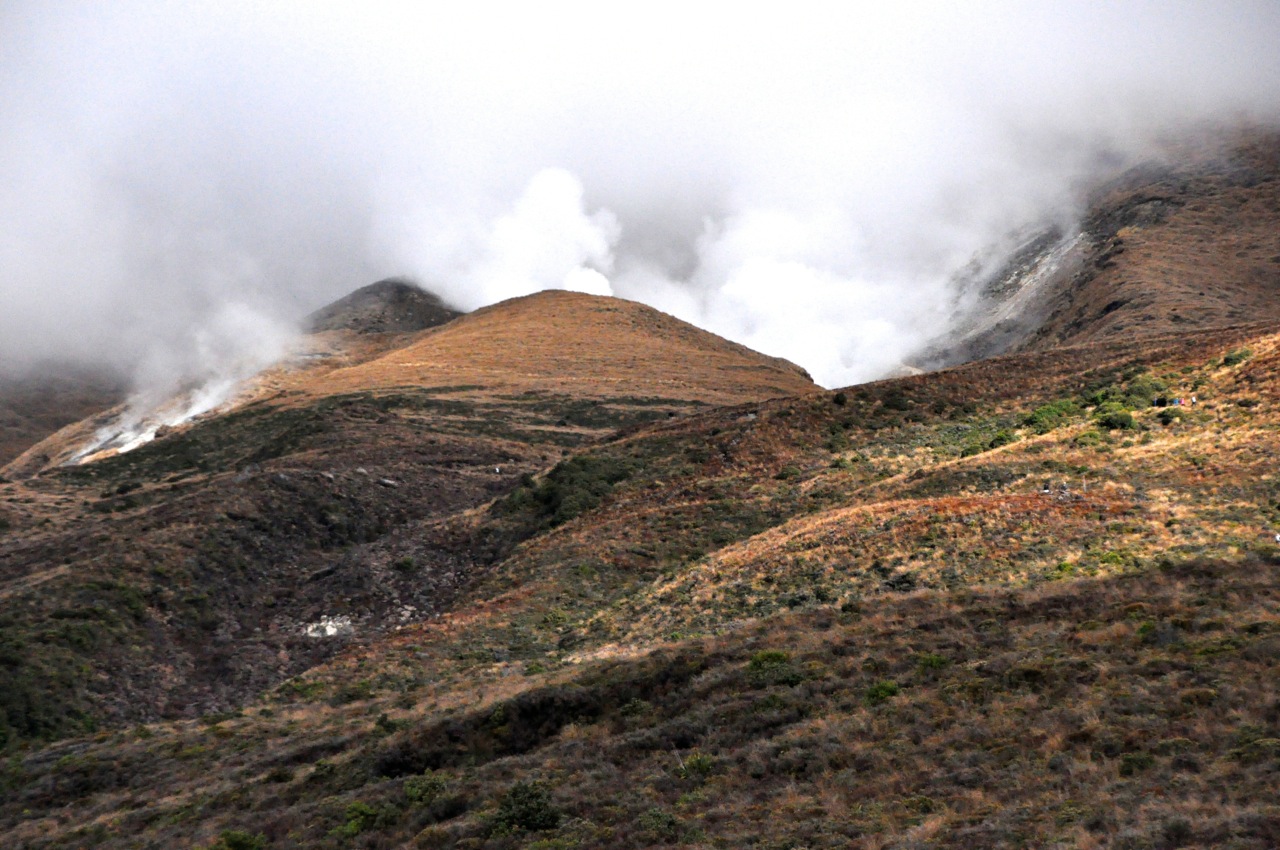
This is a last look back at the cloud generation.  It’s a lot of steam!!

Finally I’m finished with the switchbacks and long mountainside, and into forest primeval.  The occasional markers giving distance to the car park say I can still make it by 3pm – really, I should have been closer by my reckoning – but as I run/walk down the trail, and the time marches along, it looks like it’s not going to happen.  The markers have lied!!  Ah well, the forest is pretty.

In discussions with others at the car park, waiting for the shuttle to show, there is universal agreement that the markers showing distance were very misleading.  I will close Silver fern, iconic symbol of New Zealandwith a picture of a silver fern, the iconic symbol of NZ.

What a fabulous hike!


Napier, Hawke’s Bay, and …. Martinborough?

Hawke's Bay

Hawke’s Bay

We were pretty excited about visiting Napier.  Not only is it the premier city on Hawke’s Bay and close to one of NZ’s premier wine-producing regions, but it is “the world’s best-preserved collection of small-scale Art Deco architecture”.  When a 1931 earthquake leveled the city (and raised it 6 feet, and created 100 square miles of new land from the ocean), Napier rebuilt in the style of the times, Art Deco.  From my travel guide book, Napier has “a stylistic uniformity rarely seen, ranking it alongside Miami Beach as one of the world’s largest collections of Art Deco buildings.”  We love Art Deco, and couldn’t wait – and boy were we disappointed!!  It’s a relatively small town (54,000), and the qualifier in the 2nd sentence of this paragraph was “small-scale Art Deco.”  Yep.  No building is taller than 2 stories, we’re talking about a couple of city blocks, no metal anywhere, and the buildings look pretty small-town normal, with only some rather

Napier, Hawke's Bay, New Zealand

Napier, Hawke’s Bay, New Zealand (Photo credit: Sandy Austin)

unexciting painted flourishes in the Art Deco style; and maybe a kind-of-Art-Deco sconce here and there; that’s it.  After living in Art-Deco-rich Cincinnati, we know Art Deco, and this is not it.  Phooey!  I took no pictures in my disappointment; to the right is an example of a Napier “Art Deco” building that I took from the internet.

Adding insult to injury, our apartment was a disaster.  One of the lessons of traveling is that the internet lies.  Descriptions of places to stay use pictures that can be enormously misleading.  Reviews can be helpful when they exist, but some sites must allow “cherry-picked” reviews.  Our Napier apartment had glowing reviews.  Not possible!  One thing we Napier Residential arealearned is that Napier is very hilly.  Turn your back to the bay, and this is what you see.  The cliff in the picture to the left is a bit misleading; most of the (several!) hills are very steep and pointy and only approximate a cliff face.  For example, the picture below is the view from our apartment – across a gulf to the opposing hill, too steep to build on Backyard view(houses on top).  The streets navigating these vertical neighborhoods are very narrow, very twisty, and very maze-like.  Our apartment was 2 tiny rooms in the back of a house, the house near the top of a hill, the road to the house being above the house roof.  Our rooms were in the back of the house (further down the hill), so the very vertical uneven stone steps went forever down to our dwelling.  Our dwelling had a very tiny bedroom with a horrible bed, a living room/kitchen that was no larger, and a bathroom from the kitchen/living room that was a high step up to an elevated alcove.  Not only could you sit on the throne, you could lord it over the place.  I think the word is “kluge”.  We paid good money for this place (up-front).  Somehow we managed to cook a bunch of meals in cramped quarters without killing each other.  Particularly aggravating was the parking arrangement; I had asked about parking (it was not mentioned on the internet) and was told it was on-street parking, always available, perfectly safe, and very convenient.  What was not said was that the street was very narrow, the parking spot located just after a tight curve, and the street got narrower as one went down the hill (don’t go there, we were told).  It was impossible to turn the car around!  There were a few houses with short driveways on the “wide” part of the street, but they had metal posts in the middle of their driveway that they could raise to keep people out.  Clearly we weren’t the first tenants!  So turning around was a half-hour back-and-forth wiggle utilizing portions of driveways, sweating bullets not to scrape the car.   Just backing the car up the hill and around the curve was even harder.  Finally, the internet description said the apartment had a washing machine, but lied; the apartment was far too small to include one.  As it turned out, when I inquired, the apartment’s washing machine was the landlord’s washing machine, so that deception worked out OK – the landlord did our laundry for us.  A requirement for doing long-term travel, dear reader, is to have a good sense of humor.  Or lots of money for fancy digs.

Making up for our Napier disappointments were some fabulous sunsets and Hawke’s Bay wines.  First a sunset.  Not too shabby, eh?

The wines of Hawke’s Bay are impressive!  There are 70+ wineries here in one of NZ’s largest (and much exalted) wine regions.  With a climate similar to Bordeaux, these mostly Hawke's Bay Vinesboutique wineries (those producing just a few thousand cases or less) produce fine Chardonnay and lots of Merlot (that they often blend with their hard-to-fully-ripen Cabernet Sauvignon).   Of interest to me is their new emphasis on Syrah, which can be wonderfully peppery in these soils.  I loved it!  The Syrahs reminded me of the California Zinfandel wines of old – big fruit up front, pepper on the finish.

A general theme for NZ wine production is to grow vines in a valley between good-sized mountains that block the cool ocean Hawke's Bay Mountainsbreezes – and to have crappy gravel/limestone soil (the best wines here come from an area called Gimblett Gravels, where the soil is mostly a white color).  The need for mountains, however, is a nice plus; not only do the taste buds get to enjoy the wine, but the eyes get to feast on the mesmerizing and timeless mountains.

The wineries here are usually anything but big production: the vines are weeded by hand, the grape bunches are hand-picked, then hand-picked over, then gently pressed.  Many wineries are organic, most are “self-sustaining”, meaning limited/no use of pesticides or herbicides, encouraging beneficial insects, etc.  The business is labor-intensive, often family-owned and operated, CJ Paskand the wines are usually rather expensive – $30 – $50.  They are also very, very good.  The high-end Chardonnay at Church Road was amazing, as was their Sauvignon Blanc.  Probably one of the best wines we’ve had here in NZ is the Declaration (high end) Syrah from CJ Pask.

And then came the BIG surprise!  On the way to Wellington there is a small wine region that I never heard of, a region that doesn’t seem to have a name but is close to the small town of Martinborough.  Hey, it’s wine, so of course we stopped.  Work, work, work.  This Martinborough region is very compact, something like a dozen small wineries and most of them one can walk to.  It’s the North Island’s coolest, driest, and most wind-prone grape region, but produces outstanding Pinot Noir, Cabernet Sauvignon, Chardonnay, and Riesling.  We loved them.  WindbreaksThe wineries deal with the wind by using a lot of very tall windbreaks – this is very common in NZ – as shown.  Normally the windbreaks are perfectly pruned, sides and top, and since they are like 20-30 feet tall, I have no idea how they do it!

It’s a pretty region as well.

Let me show you some of the wineries.  This is Vynfields.

Here’s one of our favorites, Martinborough Vineyard.

Finally, a lunch at Poppies vineyard.

Our favorite wines from this region were Margrain, Martinborough Vineyard, Murdock James and Coney Wines.

As you may have noticed, this post is out of sequence – we did this region on our way to Wellington, whereas the last post was already about Wellington (& Weta).  I initially ignored this part of our trip because it wasn’t too exciting, but I decided it really should be there.  Next post continues with Wellington, a fascinating city not to be ignored.

Rotorua – Geothermal Wonderland

The main reason tourists flock to Rotorua is to experience the otherworldly nature of the reality of this world.  Here in Rotorua one can glimpse the inhospitable forces that lie under our feet, Moving Tectonicsthe monster that lurks under the bed.  Remember me telling you that Auckland was built on top of 50 old volcanoes?  There are a bunch of volcanoes in NZ, picturesquely so, like a Mt. Fuji look-alike (Mt. Egmont) here on the North Island (it’s off to the side and we’ll visit it another day).   Rotorua is near the middle where a band of tectonic plate intersections cross the island.  The world has been impacted by this region in the past; the picture on the left below shows NZ’s largest lake, Lake Taupo, which is over 350 square miles in size and was once a volcano.  When it blew in 186 AD, it released more ash and debris than Krakatoa and Mt. St. Helens combined – and then multiplied by ten (!!).  The Chinese noted a blackening of the sky, and the Romans recorded that the heavens turned blood-red.  Need I point out that neither of those countries is even remotely close to NZ?  The picture on the right shows one of the 3 nearby remaining volcanoes  (located in the area used for filming Mordor and Mount Doom in Lord of the Rings) that is visible from Lake Taupo.

Rotorua is special because it is the world’s most concentrated and accessible geothermal area.  Part of “world’s most concentrated” label means there are plenty of geothermal hot spots to visit around Rotorua, most with entry fees.  And of course the place abounds with spas and natural hot pools at different temperatures (do you want to emerge pink, vermillion or crimson?), along with historic Priest pools (cures arthritis and rheumatism), private rock-lined romantic pools with champagne and lake view, or Rotorua hot mud treatments, etc etc etc.  Think tourism and lots of dollars!  (Side note: New Zealand in general is very very good at offering viable enticements to separate you from your money).  We opt to see some geysers at Te Puia (of the last post) and a colorful area called Wai-O-Tapu.  Below are the Te Puia geysers.  Unlike Yellowstone’s Old Faithful, these guys go off frequently and stay going for 45 minutes or so, so they’re mostly “on”.

Wai-O-Tapu is fascinating, and very colorful.  There are many fumaroles (holes that emit steam and mineral-laden gases), bubbling ponds or puddles blissfully simmering away, mud pools farting blobs that audibly plop back down, strange-colored pools, whitish solid silica flows, etc.  Signs tell us the colors of the ponds are due to the metal chemicals that boil up in them – that blue means chloride (must be funny chlorides; not part of my analytical chemistry course), orange means antimony and arsenic, gray/chocolate means sulfur and carbon, yellow/green means sulfate, and green/yellow means sulfur and arsenic, etc.   Let’s start by looking at the bubbling mud pools making disgusting sounds.

The amount of rain determines mud consistency and therefore surface patterns; pictures at the site show interesting circular, concentric designs on the smoking surface.  Alas, we’ve had a lot of rain and the surface is less texturally interesting, but the flying ploops are fun to watch.

Fumaroles are everywhere, belching clouds of vapor and making the place look ominous.  It should be noted that you smell Rotorua well before you see it, although the intensity varies.  George Bernard Shaw stated when he visited an area of Rotorua (Hell’s Gate) that it “reminds me too vividly of the fate theologians have promised me”.  There is a Bosch-like feeling to the landscape for sure, and vapors and smells cleverly add to the impression; nice marketing, Rotorua!  Back to fumaroles, often the vapors are coming from some pretty deep pits, formed when the vapors ate away the rock and the ceilings collapsed.  Often we can not see the origin of  the smoke, it’s hiding below the rims of the

pits.  We’re on a path, frequently with a fence, and instructions are everywhere saying not to leave the path because the ground is not stable.  The deep pits before us reinforce this message that the terra may not be firma, and everybody is on very good behavior; no one leaves the paths to walk to an edge for a better picture.  Even without Ginger threatening to kill me if I even think about it, I am sufficiently convinced.  I (and the other tourists!)

are good not only because the holes are deep but because we see small pools of boiling fluid near our feet that by extrapolation must lurk in bigger quantities troll-like at the bottom of these daddy holes.  I’ll just stay on the path, thank you.

Sulfur is a frequent component of the released vapor, and it plates out as crystals on the pit walls, as shown.  The image on the left has more color than just yellow, so the emitted gas must be pretty complex.

Sulfur knobEarthquakes sometimes tilt this region to a different level, draining areas that were once fluid and leaving domes of sulfur behind.  The one shown here is about 4 feet tall.

Many of the pits seem to specialize in particular elements.  The pits below are carbon pits, with an asphalt character to them.  Some regions of the pit are boiling, and the whole pit is slowly turning over with new yucky patterns emerging, almost as if it

were being stirred.  If this were hell, one might imagine that in the antithesis, heaven, this would be hot fudge sauce.  There is certainly nothing sweet-looking about the stuff in pits in front us.

Artist's PaletteAs we walk the trail, we come to a spectacular overlook of the Artist’s Palette – a very apt name!  As you can see, the colors are amazing, and made magical by the escaping wind-blown steam providing an ethereal, shifting dominance in the visible color scheme.

Let me show you some overviews as one hikes down to the Palette (click on an image).

The large green pond in the first two images is the Champagne Pool, the largest of the hot water springs here, so named because of the bubbles of CO2 that percolate up and float on the surface (show you later).  This pool has tilted due to earthquakes, and it now leaks water off to the left, forming an extensive solid silica “river” (show you later).  Wow!  The whole vista is amazing.  The yellowish area leading up to Champagne Pool is quite variable and interesting in its own right.  It looks solid, but I would not want to walk out there – some of it seems to be just a crust over water.

When you finally get to the Champagne Pool, surprise!  It is a green pond – but with an orange perimeter!  Awesome!

As shown below, the CO2 bubbles bubbling up and bouncing on the green pond surface are everywhere (best seen if you click).

I shot the sheriffThe many colors also lead to whimsy, as in the picture to the left.  How about “I shot the sheriff”?

What is hard to appreciate from these pictures is the movement, the swirling white clouds above this technicolor fantasy.  The wind blows the clouds around, and one moment much of the pond is clear and sharp, the next a lot of the view is in soft focus, and the next you can’t see anything but cloud, which you are standing in.  This must be what dreams are like, or madness, with reality coming and going.  The clouds also greatly affect the color, muting and blurring the tones, then just as quickly snapping them into sharp vividness.  I’ve tried to capture an inkling of the color-muting and blurring below.

Now realize that you go from that first picture to the last in just a couple seconds, and back, and you’ll get an inkling of the disorienting but mesmerizing effect on the senses.

There is more to see, so we leave this misty kaleidoscope and head down the path.  It’s a strange world of ponds and rivers of off-green colors.

As we walk along we encounter moss on a bank.  Are you kidding me?  Kaleidoscopic moss

now?  Are we smoking something?  Is it in the air?  Maybe we’ll be orange when we get back?  Maybe we’re in a Beatles movie?  We press on.

Little (and big!) pools and ponds are bubbling like crazy everywhere.

Just as it can’t get any more weird, we turn a corner and suddenly the small creek beside us is filled with some form of algae, with some spectacular greens.

This stuff can live in this water?  It’s very localized, so there must be something unique about this particular environment.

We come to the far end of our hike, the lake with normalish green water.  A stream is emptying cream-green water into it (I wonder if these colors change day-to-day?), but it

seems like an ordinary green lake, even though it is green, with ducks and such having a good time.  I test the water in the stream feeding the lake and the steam is only tepid in temperature, so somewhere cool water has been entering.  In the distance are a major geothermal power plant (that supplies something like 10% of NZ’s power needs) and a volcano (Maungakakaramea, or Rainbow Mountain), looking somewhat sinister off in the distance.

The walk back is a big loop that borders the Primrose Terrace, a solid silica river that grows from the runoff of the Champagne Pool.  The Terrace is impressive in its size (we walk along it a loooong way), although it’s not particularly pretty.  Up close one can see the details of “arrested flow” as water evaporation deposits silica as “siliceous sinter”.  The vapor seen in the last picture is from the Champagne Pool, located just over the crest of the hill.

Near the end of our trip and close to where we started, high up over the collapsed-ceiling boiling pits, we encounter some reds that have no obvious source.

A little further and we encounter our final amazing sight, a large pond in the most amazing and vibrant yellow/chartreuse you can imagine.   It’s dazzling.  Your mind thinks this can’t be real, surely this is a trick by Sherwin Williams, but it’s a very big pond and must be real.

We’ve reached the end of a pretty amazing visit.   I’ll leave you with one last image.  We Hot silica meets streampassed this spot at the beginning and end of the walk;  steaming water flows over a solid silica “creek” into a rushing fluid stream, a juxtaposition of three distinct phases in this wacky wonderland.

There are more nearby geothermal sites hawking their virtues, but it is hard to think they could be better.  If you have stayed with me through this very long post, I hope you have been as amazed as we were.  We were amazed by the strange beauty, certainly, but we were also confronted with the hellish and powerful reality beneath us.  We pretend the earth is solid all the way to China.  It is not.  We walk on a thin crust, and even that crust is not what we imagine.  Just over a mile below your feet, right now, the rock at that depth is too hot to touch.  Each mile deeper and the temperature goes up another 75ºF.   Further below our feet is a seething, restless hell-monster of magma and pressure, seeking weaknesses in the crust, building strength, and biding time in a very sinister way.  How tenuous is our presumed mastery of this planet!

Rotorua – Te Puia

Rotorua is a big tourist attraction, similar to Yellowstone Nat’l Park. It’s a geothermal area with geysers and smoking holes, sulfur and bubbling mud, hot springs and spas.  It’s also a Maori center; they own some of the thermal sites and take advantage of the influx of tourists to promote traditional cultural performances including hangi, a Maori feast where the food is cooked by burying it underground over hot rocks. We’ve done the cultural thing before (Bay of Islands post) but wanted the hangi, so we’ll look at another iwi”s (tribe’s) traditions. There are several performances/hangi available from different groups; we choose the one that houses the Maori Arts and Crafts Institute for teaching and preserving the Maori carving and weaving arts.

Yes, I’ve shown you Maori culture before, and so some of this post will be repetitive; my apologies, but it is an interesting culture.  In spite of the frequently barbarous practices of these Stone-age, fierce, warring tribes (eating the vanquished was real), they created some exquisite works of art.  I’m just going to share the art.

I’ve shown you this type of carving before. These are from an outdoor atrium of Te Puia, produced by the carving school, and they’re pretty impressive.

Our tour includes some geothermal wonders (next post!), and we get to their arts school pretty late; only one student is still working away, but the place is interesting even without any explanation.  Beautiful stuff!

The weaving is also fascinating, but here everyone has left the premises.  Weaving was/is done using the NZ flax plant.  It’s a big plant, kind of like our Spanish bayonet.  The (long!) leaf is cut and used for weaving, or the flesh carefully scraped away (with shell!) to obtain the internal band of strong material and then soaked and beaten to get fiber – apparently a process that is an art in itself.  That and feathers make up the clothes.  From the look of things, this is NOT easy.

Before quickly covering the ceremony and hangi, I’ll show a replica of an early Maori village; pretty simple wood huts similar to our Pacific Northwest Indians.  The carved, elevated storage building kept the food away from rodents.  The last picture is the village entry; a village was no bigger than the fence protecting it.  Such was the life.

The meeting house looks pretty much like others we have seen.  Before contact with Europeans, the Maori had no written language; oral tradition, facial tattoos, and wall carvings recorded their ancestry and history.  The style of carvings and wall weavings varies between tribes, so what we see in this marae are different than what we’ve seen before, but the nuances are lost on us  Those in the know would recognize the tribal differences.

Finally, the ceremony and hangi.  The “welcoming” and other traditional Maori ceremonies to us was  similar to the one in we saw at Waitangi.  Apparently tribal differences are pretty small in this area, perhaps because it was an important part of communicating intent and respect – get it wrong and risk war.  Because this is a big tourist center with competing productions, we were expecting a very polished and professional performance.  Instead, we ended up thinking the more intimate one in Waitangi was better.  Pictures below.

One of the different parts of this ceremony, however, was the chance to be taught some of the traditional dances.  We, of course, were terrific at this.  (Not! ed.)

Finally, the hangi.  It was indeed a feast, with the traditional food of several kinds of potatoes, chicken, pork and lamb, but no longer is this a dirt hole-in-the-ground affair!  Now they use firebrick pits and steel covers.  Pictures below.

The dinner was very good, supplemented by soup, salads and desserts, but a bit disappointing.  We had done a Hawaiian luau many many years ago where pork was cooked in the ground after wrapping with banana leaves, and the taste was unique and wonderful.   The hangi had a lot of good food, but alas with ordinary taste, and at a not-ordinary price.  But Hey!  Done a hangi?  Check.

Next post will feature the real attraction of Rotorua, the geothermal activity where hell and the devil appear to be too close for comfort.

Glowworms

To make up for the length of the previous post, this one will be much shorter – helped by the fact that I was not allowed to take pictures on the tour.  Tour of what, you say?  We’re visiting the Waitomo Caves.  Now, I’m not a big fan of caves anymore.  I’ve done some really stupid things exploring caves as a youth, luckily surviving, and I’ve seen some major caves later in life, and for me there’s a certain sameness to them now.  Is this Old Fartdom happening?  Does one get increasingly jaded in life as one “sees it all”?   Boy I hope not, but let’s keep an eye on this attitude.  Anyway, we are not here to see the caves but to see the glowworms.  We will do that by going on a boat ride on an underground river.

The Waitomo area is limestone, the weather rainy.  Whole streams disappear down funnel-shaped sinkholes.  The rocks are often fluted.  Caves abound, as do tour companies helping you explore them.  Some tours look really cool, such as one involving an abseil (“to rope down”) 300 feet down a yawning, spectacular vertical-sided fern-draped pothole (cave exploring follows).  Others are a wet-suit-clad inner tube ride through an underground river and over small waterfalls.   We’re doing the short 45 min tour that doesn’t allow for pictures; we’re taking it because Ginger is not feeling her best and the longer (and more Waitomo Cave exitexpensive) trips that allow photos are quite a bit longer, 3+ hours.  And really, in all cases the major attraction of these tours is the glowworms, which we’ll get.  We start by walking into a cave, then hopping in a boat for a short drift through the glowworm region.  Cave exit is shown in the picture (which I’m allowed to take).

Glowworms exist throughout NZ, mostly in caves (where we can see them in daytime).  Glowworms, in the adult form, look like large mosquitos; they live for  3 days, not eating but having lots and lots of sex, finally dying of exhaustion but with big glowworm threadssmiles.  The female multi-tasks and finds time to lay eggs during the orgies, the eggs hatch, and the small 3mm larvae attach themselves to the cave roof.  They then lower 20-30 basically invisible mucus-and-silk threads (like fishing lines – more later).  The picture to the left shows them, illuminated from the side.  How did I take this photo? Alas, I took it directly from the brochure, but it might as well be my “live” picture.  It looks like this, folks!  Without side lighting, however, they are invisible.  Caves, you may know, are dark.  Normally.  But glowwormsglowworms are bioluminescent, producing a mostly blue, greenish-tinged glow.  When your eyes adjust to the dark, there they are, everywhere, shining like blue stars.  Pretty cool.  The brochure picture to the left gives you the idea of what you would see, but it is much better in the flesh in the cave with the shining stars just a few feet over your head.  So what is the story here?  The bioluminescence attracts flying insects in the dark cave.  They encounter the hanging mucus threads and get stuck.  The larvae pulls up the line, eats the ensnared prey, and drops down another line.  The larvae grow from a few mm to the size and shape of a matchstick, so this process works pretty well.  It’s scary out there, folks!  It’s The Blob of the insect world (old SF movie to you newbies).  But for us, these Blue Meanies are just really, really fairy-like magical.  Sorry I don’t have better pictures to show you, but it probably would have been hard to capture them without a tripod.

To Inhabit a Hobbit Hole, or Not?

That was the question.  Not as momentous as “To be, or not  …”, but still, it’s $75 a pop for a 1.5 hr tour of the Hobbit movie set, and c’mon, is this a made-up tourist thing or what?  And we’re guarding our sheckles in this expensive country.  So we said “No”, and then we thought – “We’re this close?  Would our inner kids ever forgive us?”  So here we are, not at all sure about our decision as a very rickety 1950’s repainted and frequently rehabbed school bus on its last legs lumbers and wheezes up, gears grinding, to take us to Hobbiton from the Shire’s Rest Cafe-and-souvenir-shop (just after a pouring rain ….).  Hobbiton is the set left behind after filming the first Hobbit film.  The Lord of the Rings filming built the place, but that Shire was made of plywood and styrofoam, meant to be removed.  However, in the process of tearing it out the rains came and stopped the work, and then the locals starting showing up to see the location, and thus was born a tourist industry.  For the first installment of the Hobbit, the Shire was rebuilt with an incredible (can I say maniacal?) attention to detail, and here it stands, expanded in fact for the 2nd Hobbit installment (but we’ll get to that).

The beautiful area was and is a very large sheep farm, chosen by Peter Jackson from

The sheep farm

View of the area from Shire’s Rest.

an aerial search of this idyllic hilly land to correspond with Tolkien’s description.  I’d like to show you an overview of the Shire, but the bus doesn’t stop, the road is bumpy, and the bus has no springs.  Staying in the seat is hard enough, much less shooting a picture, and the view comes and goes.  The best I can do is take a picture of the schematic on their brochure, so there it is in all its glory.  Sigh.  A real picture would have been cool.  DSC_0046

Anyway, back to the choice of the Hobbiton site; the existing lake already had a “party tree” in front of it, and importantly, there were no roads, buildings or electrical lines to mar the view.  Peter Jackson got the NZ government to volunteer the NZ Army to spend 9 months building the road and site.  At its peak, 400 people were on site for the filming of the few minutes of the Shire in the Lord of the Rings series.

On the bus our guide tells us we have to stay with him at all times and to keep on the trail that winds past many of the Hobbit houses.  So there are real limits to picture taking – particularly Hilltop Tree (fake)overviews!  I will not be able to walk back up this road, for instance.  Groan!  And we paid how much money?  And then we’re there, and the doubts melt away, because it’s fabulous.  Peter Jackson’s attention to detail is stunning.  Perhaps this is a requirement for movie directors?  The budget for this movie was astronomical, yet Jackson managed to overspend by quite a few million (the movie,  of course, was in the black after opening day, so there weren’t many complaints).  As an example of Jackson’s approach, he needed an oak tree on top of Bilbo’s house (Bag End) at the top of the Shire, so he found the one he wanted elsewhere, had it cut down, the branches numbered and cut off, and transported and re-assembled at Bag End.  He then imported artificial leaves from Taiwan and had them individually wired onto the dead tree.  And there it is today, unchanged, as shown in the picture.  Similarly, Jackson creates a small orchard of plum trees since Tolkien writes of a child under a tree eating plums with pits piled up; but the tree shapes are all wrong to Jackson, so he has them pulled out and “Hobbit-like” apple and pear trees planted.  However, with the shooting sufficiently delayed in spring, the trees are leafing out and they are not plum leaves.  Well, that won’t do, will it?  So for filming he Lichenrepeats his tree trick, plucking the leaves off an apple tree and wiring plum leaves from Japan in their place.  I can roll my eyes at this perfectionist thing, but it works; all this detail makes Hobbiton magical, and almost alive.  Jackson had to make the place look like it had been around a while, so the wood was artificially aged, the fences sprayed with artificial “lichen” (some substance mixed with wood chips), etc.  And it is all wonderful.

I took a LOT of pictures of this exquisite place, and I don’t really want to choose among them, so I will simply show you most of the bazillion pictures I took.  Sorry about that, you do the work!  Will this post be long?  “You betcha”, as a famous lady once said.  To help readers who might be only peripherally interested in this topic, I have arranged this blog in three parts.  There is a looooonng section on the Hobbit houses, a short segment on the upcoming Hobbit sequel out next month, and then a section on the delightful Green Dragon Inn.

HOBBIT HOUSES!  OH MY!

There are 42 hobbit-hole facades on the hillside, of different sizes for filming, and they are charming.   I’m not going to show all 42 (alas, I didn’t get to see them all!), but I will show many (and I think you will want even more).  Before I do that, let me show you some overall pictures of the Shire; although I’m in the Shire and it’s in my face, it’s impossible to get more than pieces of it.  The first one is looking up from near the bottom, the second is looking down from near Bag End.  Alas, the snippets don’t really capture the magical feeling of the place.

The next picture is another piece of the Shire, near the “river” (lake); the last near the entrance to the Shire marking the directions of three of the four Farthings (great name, that).

We are enthralled by this place because of the detail.  It is the essence of quaint and cute!  The place is alive!  Hobbits live!  It convincingly looks like all the Hobbits have left for a meeting or something, and will be right back.  One expects to see the tobacco pipes left behind to be still smoking.  As an example, take this Hobbit house: The broom, the flower pots, the coat on the bench, the rug airing out on the fence ….

Add the scale, which makes it quite adorable.

Here’s another one, with us nearby for perspective.  It looks inviting, sure enough, but the pull-away view shows all the props that make the place seem so real.

The emphasis on detail is everywhere: dormer windows poking up, chimneys with soot on them, laundry on the line.

Or this example, with the carpenter’s (woodworker’s?) house and tools, and next door the wood shed.

OK, this last example.  Carving on the door frame, items showing through the window, potted plants on the ground.  And then step back and see the whole picture of this house – laundry on the line, the basket of washed clothes just below, a water bucket by the fence ….  At whatever distance you view the place, it is captivatingly homey and charming.

Just to play, I decide to hide in the house below and see if Ginger can find me.  Well, it wasn’t so hard to do; the Hobbit holes only go back a few feet before they end, just enough to very comfortably store stuff (remember to click for the slideshow).

I hope you’re ready to see more Hobbit houses, because here they come. These are paired images of 3 houses.

This is a study of one house:

A couple more pairs:

Another.

Another.

Getting tired of this?  A last set …..

What you haven’t seen in all this is Bilbo’s house, Bag End.  That’s because, irritatingly, it has been pre-empted by a publicity shot for the upcoming Hobbit sequel and the area is blocked by people and cameras.  Below are three shots, one glimpsing the interior of Bag End (which actually has a small section of finished interior, which is visible when Bilbo meets Gandalf at the door).  The other pictures show the side of the house (we weren’t allowed any closer).

BAG END AND THE HOBBIT SEQUEL, “THE DESOLATION OF SMAUG”

So I’m grumpy because we aren’t going to see the interior of Bag End, and I’m talking to one of the crew milling about, and she says “Yes, when we were filming The Hobbit….”  Hmm.  So this is no pick-up crew.  The filming is for publicity of the Hobbit/Smaug film (you need marketing for THAT film?) here in NZ (although the guide tells Ginger it’s for an ad for Air New Zealand), and there are 3 actors in costume, pretty much hiding away inside Bag End.  Apparently there is a lot of secrecy around the new Hobbit film that I am unaware of, and my camera is eyed suspiciously, and we are not invited anywhere near Bag End.  Below are the shots I get.

We leave (we’re the last tour of the day), and the filming crew move down for a shot as we Publicity for Smaugdepart, so I hightail it back to sneak in my own picture of the actress, who I guess will be in the Smaug film?  We’ll see.  Actually, before getting to Bag End our guide pointed to a couple Hobbit Houses off to the side that he will not take us to, since they were just recently built for the Smaug sequel and Peter Jackson doesn’t want people to see them until after the film (why?).  I take pictures with the telephoto lens.  They should be in the Smaug movie; I’ll look for them (and say I was there!  Sort of).

THE GREEN DRAGON

Green Dragon SignThe Green Dragon – and the mill and bridge – were rebuilt, exactly replicating the first temporary structures.  This is a functional restaurant and bar, catering only to the tourists.  They serve specially brewed (just for  them!) ales and ciders, as well as “Hobbit fayre” like beef-and-ale pie or cold-pork pie.  And a boatload of atmosphere!  Below are overviews, and as you can see, this is one big inn!

So – to the Dragon!  And let us not forget the cute mill.

Below is the Green Dragon exterior – too big to get it in one image!  It is impressive.

Again, up close there is a lot of detail to see, such as the carving on these two different bays:

Inside partakingAs charming as the outside is, thatch roof and all, the inside is even better.  It successfully makes you feel like a Hobbit yourself, with its circular windows and doors.  Isn’t that a Ginger Hobbit there, partaking?  Everywhere inside are huge  (huge and real!) beams and cross timbers, all smooth and polished.  The subdued lighting gives the impression there are candles behind the glass.  The pictures below don’t quite capture the ambiance, but you’ll get the idea:

Although the place is huge and has some larger rooms, it is also nicely broken up into smaller, cozy corners, as shown:

Details - coatsThe attention to detail is also present inside, evident in things like hanging jackets and (Hobbit) portraits on the walls. Details

And let’s not forget the Inn’s namesake Green Dragon: It’s truly gorgeous.

Finally (were you despairing?), the inn’s food and drink.  Serving the trapped tourists at the end of the tour (you get a free drink), what would you expect for prices and quality?

We had low expectations, but the prices looked good, so why not?   Besides, it was an excuse for savoring the interior (and the fireplace).  We ordered beef and ale pies.  I had an ale, Ginger the cider.  The pies were small, to be sure, but extremely good, as were the drinks.  Surprise!!  We would happily have had more, but the day was over and the bus was leaving.  It was indeed a delight to almost believe in the existence of Hobbits for awhile, and to visit the Shire.